

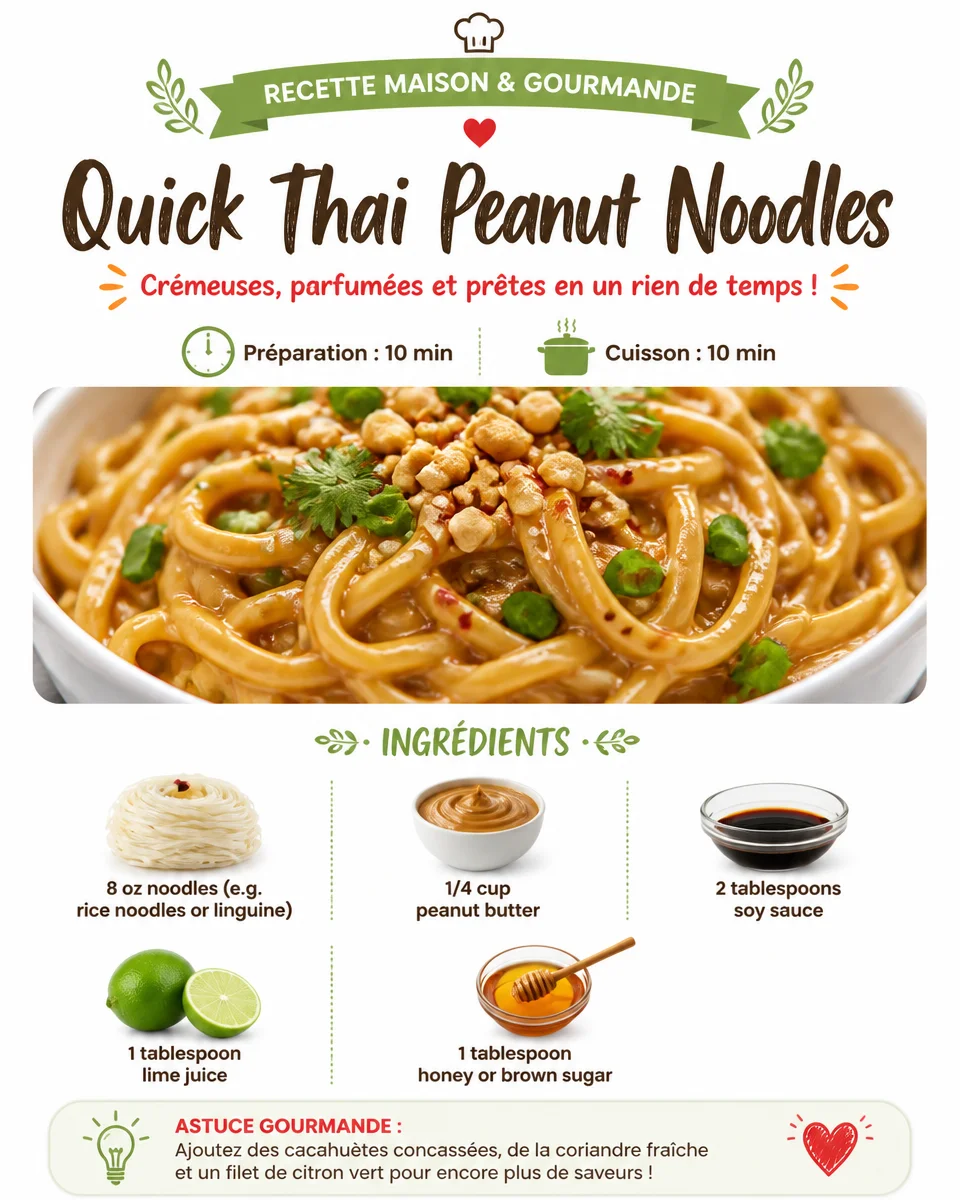

Quick Thai Peanut Noodles
Quick Thai Peanut Noodles are a simple yet delicious dish perfect for busy weeknights. This comforting meal combines creamy peanut sauce with perfectly cooked noodles for a satisfying experience. You may also find 1 Pot Chickpea Tomato Peanut Stew useful.
Why Make This Recipe
Making Quick Thai Peanut Noodles is a great choice for several reasons: You may also find Chicken Hakka Noodles useful.
- Quick Prep Time: You can whip this dish up in under 30 minutes.
- Versatile Ingredients: You can customize it with veggies or proteins of your choice.
- Healthy Option: Packed with flavor while being good for you.
If you enjoy easy noodle dishes, consider trying vegan Thai skillet noodles for a delightful variation!
How to Make Quick Thai Peanut Noodles
Ingredients:
- 8 oz noodles (e.g., rice noodles or linguine)
- 1/4 cup peanut butter
- 2 tablespoons soy sauce
- 1 tablespoon lime juice
- 1 tablespoon honey or brown sugar
- 1 teaspoon sesame oil
- 2 cloves garlic, minced
- 1/4 teaspoon red pepper flakes (optional)
- Chopped scallions and peanuts for garnish
Directions:
- Cook the noodles according to package instructions; drain and set aside.
- In a bowl, whisk together peanut butter, soy sauce, lime juice, honey, sesame oil, garlic, and red pepper flakes until smooth.
- Toss the cooked noodles with the peanut sauce until evenly coated.
- Serve topped with chopped scallions and peanuts.
How to Serve Quick Thai Peanut Noodles
You can serve Quick Thai Peanut Noodles as a main dish or a side. They pair well with grilled meats or a crisp salad. For a heartier meal, try adding shrimp from our creamy peanut shrimp and mushroom noodle soup recipe!
How to Store Quick Thai Peanut Noodles
If you have leftovers, store them in an airtight container in the refrigerator. They will last for about 3 days. Just reheat in the microwave when you’re ready to enjoy them again.
Tips to Make Quick Thai Peanut Noodles
- Use freshly minced garlic for a more robust flavor.
- Adjust the spiciness by changing the amount of red pepper flakes.
- Add vegetables like bell peppers or carrots for added nutrition.
Variation
Feel free to swap the noodles for whole wheat or gluten-free options, depending on your dietary needs.
FAQs
1. Can I make this recipe vegan?
Yes, simply use maple syrup instead of honey.
2. What can I add for extra protein?
You can toss in some cooked chicken or tofu.
3. Where can I buy Asian noodles?
You can find a variety of noodles at local grocery stores or buy them online. Buy it here.
Quick Thai Peanut Noodles are a delightful meal that is easy to prepare and customize, offering a delicious taste with a quick cooking time.
Quick Thai Peanut Noodles
A simple yet delicious dish that combines creamy peanut sauce with perfectly cooked noodles, perfect for busy weeknights.
Main Ingredients
- 8 oz noodles (e.g., rice noodles or linguine)
- 1/4 cup peanut butter
- 2 tablespoons soy sauce
- 1 tablespoon lime juice
- 1 tablespoon honey or brown sugar (Use maple syrup for a vegan option)
- 1 teaspoon sesame oil
- 2 cloves garlic, minced (Use freshly minced for better flavor)
- 1/4 teaspoon red pepper flakes (Optional, adjust to taste)
Garnish
- Chopped scallions and peanuts
Preparation
- Cook the noodles according to package instructions; drain and set aside.
- In a bowl, whisk together peanut butter, soy sauce, lime juice, honey, sesame oil, garlic, and red pepper flakes until smooth.
- Toss the cooked noodles with the peanut sauce until evenly coated.
- Serve topped with chopped scallions and peanuts.
Store leftovers in an airtight container in the refrigerator for about 3 days. Reheat in the microwave when ready to enjoy.