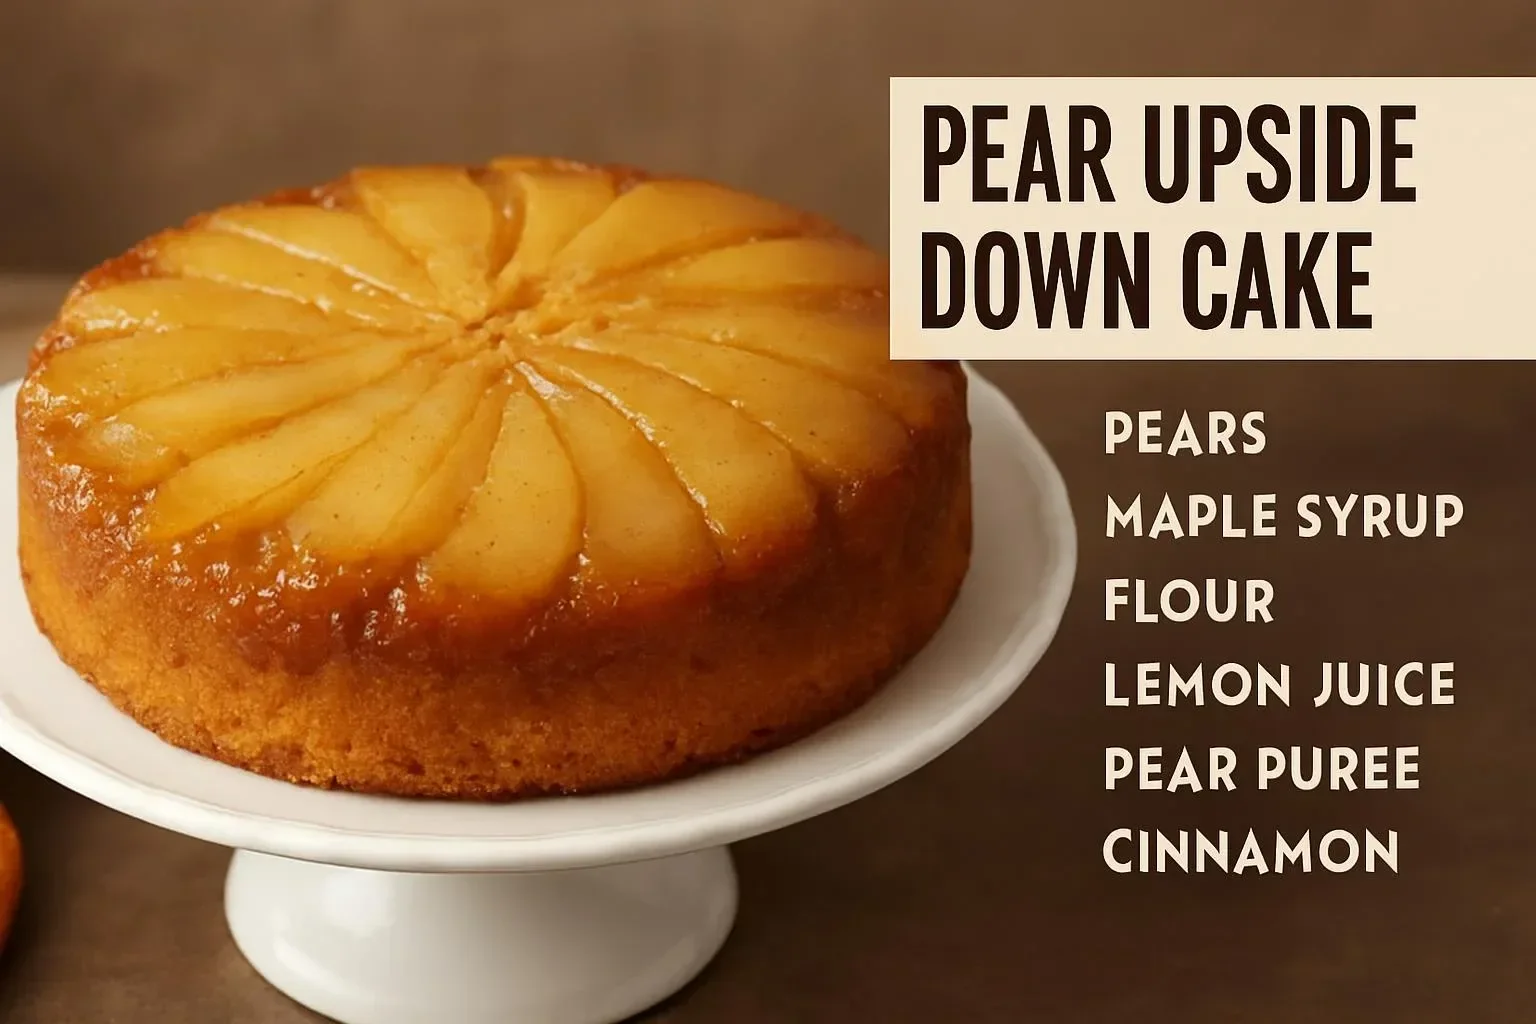
Vegan Pear Upside-Down Cake is a cozy, simple dessert that brings sweet pears and warm spices together.
- introduction — Vegan Pear Upside-Down Cake
- why make this recipe — Vegan Pear Upside-Down Cake
- how to make Vegan Pear Upside-Down Cake
- Ingredients : Vegan Pear Upside-Down Cake
- Directions : Vegan Pear Upside-Down Cake
- how to serve Vegan Pear Upside-Down Cake
- how to store Vegan Pear Upside-Down Cake
- tips to make Vegan Pear Upside-Down Cake
- variation (if any) — Vegan Pear Upside-Down Cake
- FAQs — Vegan Pear Upside-Down Cake
introduction — Vegan Pear Upside-Down Cake
This Vegan Pear Upside-Down Cake is easy to make and great for guests or a weeknight treat.
It uses common pantry ingredients and ripe pears for a soft, tasty top after you invert the cake.
If you like quick sweet recipes, try a similar simple dessert like high-protein lemon blueberry cake for another easy option.
why make this recipe — Vegan Pear Upside-Down Cake
Make this Vegan Pear Upside-Down Cake when you want a plant-based dessert that feels special but is not hard to bake.
It is a good way to use ripe pears and to enjoy warm spices like cinnamon and cardamom.
You can pair it with soups or light meals for a full, homey menu; for a cozy starter, see this comforting soup recipe idea.
how to make Vegan Pear Upside-Down Cake
Follow simple steps to make the Vegan Pear Upside-Down Cake that turns out moist and fragrant.
Prepare the fruit first, mix dry and wet ingredients separately, then bake and invert while warm for the best topping shine.
For tips on working with non-dairy milk and batter texture, you can also look at a milk-free pancake guide like pancakes without milk.
Ingredients : Vegan Pear Upside-Down Cake
- 4 ripe pears, peeled and sliced
- 1 cup all-purpose flour
- 1/2 cup almond flour
- 1 tsp baking powder
- 1/2 tsp baking soda
- 1/4 tsp salt
- 1/2 cup sugar
- 1/3 cup vegetable oil
- 1/4 cup non-dairy milk
- 1 tsp vanilla extract
- 1 tsp ground cinnamon
- 1/2 tsp ground cardamom
Directions : Vegan Pear Upside-Down Cake
- Preheat the oven to 350°F (175°C). Grease a round cake pan.
- Arrange the sliced pears in the bottom of the pan.
- In a mixing bowl, combine the all-purpose flour, almond flour, baking powder, baking soda, salt, sugar, cinnamon, and cardamom.
- In another bowl, mix the oil, non-dairy milk, and vanilla extract.
- Combine wet and dry ingredients until just mixed.
- Pour the batter over the pears in the pan.
- Bake for 35-40 minutes or until a toothpick comes out clean.
- Let it cool slightly before inverting onto a plate.
how to serve Vegan Pear Upside-Down Cake
Serve the Vegan Pear Upside-Down Cake warm or at room temperature.
Top with a dusting of powdered sugar, a scoop of vegan ice cream, or a drizzle of coconut cream for extra richness.
Cut into wedges and serve with tea or coffee for a cozy pairing.
how to store Vegan Pear Upside-Down Cake
Store the cake in an airtight container at room temperature for up to 2 days.
For longer storage, wrap well and refrigerate up to 5 days.
You can warm slices in the microwave for 10–20 seconds before serving.
tips to make Vegan Pear Upside-Down Cake
- Use ripe but firm pears so the slices hold shape during baking.
- Don’t overmix the batter; stir until just combined to keep cake light.
- Grease the pan well or line it with parchment to help the pear topping release cleanly.
- Check doneness with a toothpick in the center; if it comes out clean, the cake is ready.
variation (if any) — Vegan Pear Upside-Down Cake
- Swap almond flour for oat flour for a different texture.
- Add chopped nuts (walnuts or pecans) over the pears for crunch.
- Replace cardamom with nutmeg or ginger for a different spice profile.
- Use canned pear slices if fresh pears are not available, but reduce sugar slightly if canned pears are in syrup.
FAQs — Vegan Pear Upside-Down Cake
Q: Can I use other fruit instead of pears?
A: Yes. Apples, peaches, or pineapple work well for an upside-down cake and bake similarly.
Q: Is this Vegan Pear Upside-Down Cake nut-free if I skip almond flour?
A: Yes. Replace almond flour with more all-purpose flour or a seed flour to make it nut-free.
Q: What tool can help slice pears evenly?
A: A simple pear slicer or an adjustable fruit slicer helps make even slices. Buy it here
Q: Can I make this cake gluten-free?
A: Yes. Use a 1:1 gluten-free flour blend in place of all-purpose flour and check texture; you may need a little more liquid.
Q: How can I make the topping more caramel-like?
A: Sprinkle a bit of brown sugar or a mix of brown sugar and vegan butter on the pear layer before adding the batter for a deeper caramel flavor.
Vegan Pear Upside-Down Cake
Ingredients
Fruit Layer
- 4 pieces ripe pears, peeled and sliced Use ripe but firm pears so the slices hold shape during baking.
Cake Batter
- 1 cup all-purpose flour
- 1/2 cup almond flour Can be swapped for oat flour for a different texture.
- 1 tsp baking powder
- 1/2 tsp baking soda
- 1/4 tsp salt
- 1/2 cup sugar Reduce sugar slightly if using canned pears.
- 1/3 cup vegetable oil
- 1/4 cup non-dairy milk Use any preferred non-dairy milk.
- 1 tsp vanilla extract
- 1 tsp ground cinnamon
- 1/2 tsp ground cardamom Can be replaced with nutmeg or ginger.
Instructions
Preparation
- Preheat the oven to 350°F (175°C). Grease a round cake pan.
- Arrange the sliced pears in the bottom of the pan.
- In a mixing bowl, combine the all-purpose flour, almond flour, baking powder, baking soda, salt, sugar, cinnamon, and cardamom.
- In another bowl, mix the oil, non-dairy milk, and vanilla extract.
- Combine wet and dry ingredients until just mixed.
- Pour the batter over the pears in the pan.
Baking
- Bake for 35-40 minutes or until a toothpick comes out clean.
- Let it cool slightly before inverting onto a plate.